For quite awhile I pondered about what I should call my N scale world. Then, while
I was standing there one evening working on the layout, the name hit me - The Coffee
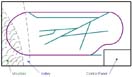
Valley Railroad. See, part of my landscape will consist of a valley. As
part of my planning, this valley was marked off with masking tape. I realized that
almost every time I worked on the layout, I would have a cup of coffee with me.
Since I was working on the track plan, I needed a safe place to set the cup. So, I
placed it in the valley because I knew I would not be placing any buildings or tracks
there and the cup would, therefore, not be in the way. I plan to name the valley
Coffee Valley, of course. I like the name. Now I just have to come up with a
logo...
|
|
|
|
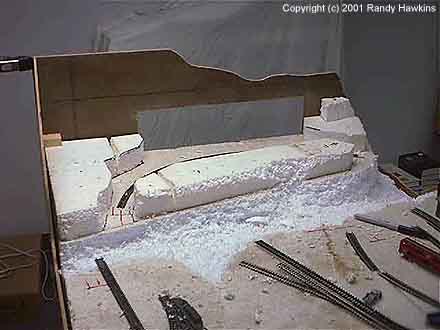
The layout is 3' x 6' and about 42" high. The legs are easily removable with
casters on the bottom. One corner of the top is for the control panel. It sits
at a slight angle - comfortable for use when I am sitting on a stool or standing.
The control panel will be hinged on the side closest to me, allowing easy access to the
back side for wiring work. 6" thick insulating foam is glued to the top.
This allows for 'digging' out the valley and adding additional foam to build up the
mountain.
|
At this point, the legs are
built and attached. The one sharing the corner with the control panel does not have
a front cross brace. This is so that I don't hit my leg on it when sitting at the
table. I have placed some track on the table to get a feeling for the layout.
The masking tape represents the locations of the mountain and valley.
I now have all the base foam
down. It is approximately 6" thick and is glued to the table top. This will allow me
to easily dig out the valley and the underpass. The mountain will be thinner pieces
of foam built and shaped as needed. The underpass is located on the control panel
end of the layout.
It is now time to start working
on the fascia. For this, I took some old wall paneling and cut it to shape. I did
not want it to look like old wall paneling so I placed the backside out. It will look just
fine after I paint it.
|